Falcon ramp: walls and corridor customization
- Laurent
- Feb 8, 2019
- 3 min read
Updated: Mar 2, 2020

Goal of this customization:
The goal is to reproduce the ramp access to the corridor as well as the walls shape and details as close as possible to how it was used in the movie sets and drawn on blueprints, considering the space and geometry constraints given by the Deagostini model.

Cutting the frame:
The frame of the ramp area was removed using a Bremel like tool with a thin cutting disk. The red areas and circles show where the frame has been cut.

Vertical parts of the frame were cut at the mid height as I want to keep them for both fixing and strengthening the modified ramp walls. The frame that was removed is kept for fixing the translated ramp motor to the added ramp walls later.

I added 5 extra 2-hole connectors (yellow) to consolidate the frame around the ramp access area. A Ø1.8 mm drill bit was used to fixe the extra 2-hole connectors to the frame. This is enough for screwing the Ø2 mm black Phillips button head screws without any threading.

New wall structural elements:
Below is a technical sketch of the customization before playing with styrene and scratch build the ramp walls. Templates can be found in the download page.

The templates are then used to draw the wall main structure on styrene sheets.

The styrene sheets are then cut and the parts glued to create the main walls in which details will be added later.

First verification of the main access ramp modification and adjusting the different parts to produce the best fit.

Ramp walls customization:
I am filling the gaps with styrene (in yellow) to improve local imperfection in the customization.

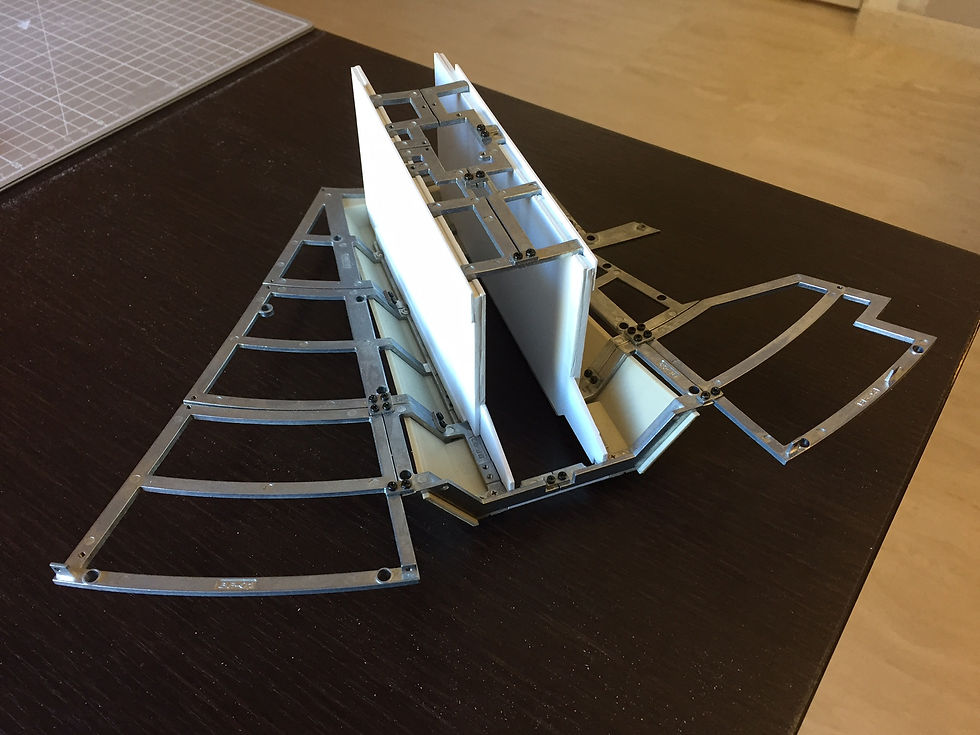
Here are the two ramp wall almost done with 100% styrene. For the details, I used a symmetric pattern based on available blue prints, except for the greebles. The circular cuts are for the extra corridor part that we should see when the ramp is down.

The customized wall in place within the ramp area.

I then added some holes for potential lighting and two holes on each wall for the axis (hinge) of the new ramp mechanism.

Ramp ceiling:
The ramp ceiling has been built with 2 mm thick styrene sheet, rods (1/4 circular section) and small rivets for the lights. Here is where I found the small rivets: AliExpress.

Here is the ceiling in place with the walls.


Ramp corridor access:
I started with a plan as I needed to solve space problem with the addition of the new ramp and associated corridor part.

I then used of a spare corridor from the port wall and cut it to fit the modified ramp.

I glued the upper and lower modified corridor parts and add a styrene floor. I cut the base of the corridor to fit the lower turret ring frame (another space problem to solve!) and open a big hole for the ramp access.

I then added customized cushion pads inside the corridor. The cross on the back central cushion pad is the location of one light.

The ring pads have been filed sharp on the outside to (1) reduce their size as they will be doubled with the mirror and (2), attenuate the gap between the pads and their reflection and give the effect of single pads. Also from the movie set, it seems that the pads are more rectangular than square.

I decided to add two circular mirrors (Ø 50 mm) on both ends of the extra corridor part.


Below is the extra corridor part in place to check the fit and rendering.


Just for the fun...

As I was not really satisfied with the circular mirrors that I placed on both sides of the corridor up the Falcon ramp, I decided to test mirror sheet. Comparison between the classic glass mirror (right) and the mirror sheet (left). The mirror sheet has a much thinner transparent plastic cover than the classic mirror, which has a thick glass cover.

The advantages of the mirror sheet is that it reduces the gap caused by the mirror thickness, it is easier to cut the shape we want, it is as sharp as the classic mirror, diffraction is reduced, it is lighter. The drawbacks are that the plastic cover can be scratched more easily than the glass cover and that it has to be glued to a flat hard surface to avoid any distortion (here I am using 1 mm styrene sheet).

With the two mirrors...


Stay tuned as there will be MORE TO COME...
Comments